Valheim Base Building Guide 2026 — Structural Integrity, Locations & Defense
A complete guide to building in Valheim. Understand the structural integrity system to never have a collapsing roof again. Discover the best base locations across all 7 biomes. Set up a workshop with max comfort for the longest rested buffs. Build defenses that stop every raid type. Design a portal network that connects your entire world. Master each building material from wood to grausten.
🏗️ Structural Integrity System
The most misunderstood system in Valheim. Once you understand stability colors and piece HP degradation, you'll never build a collapsing structure again.
Every building piece in Valheim has a stability value that determines how much weight it can support. When you place a piece that touches the ground, it shows as blue — this is your foundation, the strongest possible connection. As you build upward and outward, each subsequent piece loses stability, shown by a color shift from blue toward red. If a piece reaches zero stability, it collapses immediately.
The five stability colors, from strongest to weakest:
- Blue — Foundation or ground contact. Maximum stability. Pieces touching terrain, blue structural pieces, or placed on already-blue foundations show this color. Your starting point for all vertical construction.
- Green — Stable. These pieces are one or two steps removed from the foundation. You can safely build on green pieces, but adding too much weight will push them toward yellow.
- Yellow — Getting unstable. Pieces at yellow are approaching their load limit. Building additional weight on yellow pieces may cause breakage. Yellow is the warning zone — reinforce before building further.
- Orange — Very unstable. Orange pieces will break if you add any significant additional weight. Do not build on orange pieces unless absolutely necessary, and never place heavy roof tiles on orange supports.
- Red — Immediate collapse zone. A red piece means it is at zero stability and will break the moment any additional load is applied, or sometimes spontaneously during a physics tick. Red means rebuild from a stronger foundation.
How stability degrades with distance: Each building material has a base stability radius — essentially how far from ground contact it can support itself and other pieces. The distance is measured in "pieces" rather than meters, but the effective height limits are well established:
- Wood pole — approximately 4m from ground contact before pieces start breaking
- Core wood pole — approximately 8m, roughly double standard wood
- Stone — approximately 20m, enabling castle towers and fortresses
- Iron-reinforced beam — approximately 50m, the maximum height material in the game
Supporting ground is any piece that touches the terrain (the ground, a rock, or a tree) and appears blue. These pieces act as the anchor for your entire structure. If you build a wooden floor directly on the ground, every piece touching the ground is a foundation. If you build on a slope, only the pieces that physically contact the terrain turn blue — pieces over empty space start at green or yellow.
The snap system: Valheim's building snap system automatically aligns pieces to a grid. Use this to plan structurally sound builds. Key tips: always place corner posts first (they carry vertical load), run horizontal beams between posts for lateral stability, and never span more than 4-6m of unsupported roof. If a piece shows red during placement, it will collapse after placement — cancel and reinforce the support structure first.
⛏️ Foundation Materials
Six building materials, each with different height limits, strength ratings, and biome requirements. Choose the right material for your project.
| Material | Max Height | Strength | Unlock Biome | Best For |
|---|---|---|---|---|
| Wood | 4m | Basic | Meadows | Starter shelters, temporary outposts |
| Core Wood | 8m | Medium | Black Forest | Taller wooden structures, log cabins |
| Stone | 20m | High | Swamp (via Iron) | Castles, fortresses, permanent bases |
| Iron-reinforced beams | 50m | Very High | Swamp (iron scrap) | Maximum height builds, mega-structures |
| Black Marble | 20m+ (with iron) | Very High | Mistlands | Mistlands bases, endgame builds |
| Grausten | 30m+ (with iron) | Very High | Ashlands | Endgame mega-builds, fortresses |
Wood is your first building material and is perfectly adequate for starting bases. It requires only a Workbench and a nearby forest. The main limitation is height — standard wood poles reach roughly 4m before the stability drops into the red zone. Use wood for your first shelter, a starter crafting area, and temporary outposts in the Meadows and Black Forest.
Core Wood is harvested from Pine and Fir trees in the Black Forest. It reaches about 8m — double the height of standard wood — and supports heavier loads. Core wood beams and poles are the go-to material for two-story wooden structures and log cabin-style buildings. Core wood also burns in the Hearth, making it a dual-purpose resource.
Stone unlocks once you craft a Stonecutter, which requires Iron (from the Swamp). Stone supports up to 20m of height and is completely fire-resistant — important because later enemies (like Fulings and Drakes) can damage wood but not stone. Stone walls are the standard for any permanent base. However, stone alone cannot reach the heights that iron-reinforced beams can.
Iron-reinforced beams are the "spine" of any mega-build. Crafted from Iron Scrap (mined in the Swamp) at a Forge, these beams have the highest stability in the game, supporting up to 50m. The standard technique is to build iron beams inside stone walls — the stone provides the fire-resistant shell and the iron provides the structural backbone. If you want to build a towering castle with multiple floors, iron beams are essential.
Black Marble is the premium building material of the Mistlands. It has excellent stability (20m+ on its own, higher when reinforced with iron beams) and a distinctive dark aesthetic. Black marble pieces include intricately carved pillars, walls, and arches that make for stunning endgame bases. It requires a Black Marble cutter crafted from Black Metal and Soft Tissue.
Grausten is currently the highest-tier building material, available in the Ashlands. It has exceptional stability (30m+ with iron reinforcement) and extreme durability against all damage types. Grausten is the material of choice for Ashlands bases that need to withstand the harsh environment and endgame raid events. It requires heat-resistant gear to harvest safely.
🗺️ Best Base Locations
Where you build matters as much as what you build. Here are the best base locations across all 7 biomes, ranked by safety, resource access, and strategic value.
1. Meadows Coast — Safest, Easiest Boat Access
The Meadows is the best location for your starter base. It features abundant wood and stone resources, flat terrain perfect for building, no dangerous enemy spawns (only boars and necks), and easy access to the coastline for dock construction. Build within sight of the Sacrificial Stones for a convenient spawn point. The biggest advantage is safety — you can learn the building system without worrying about raids destroying your work.
Best For: Starter base. Avoid: Building too close to the Black Forest border, as greydwarves may wander into your base area.
2. Black Forest near Copper Deposits — Early Mining Outpost
Once you need Copper and Tin for the Bronze Age, set up a mining outpost in the Black Forest near copper deposits. Keep it close to water for easy bronzE transport by boat. The Black Forest has more aggressive spawns (greydwarves, skeletons), so surround your outpost with a stake wall and workbench coverage to prevent enemy spawns inside your perimeter.
Best For: Early mining outpost. Avoid: Building near Troll caves, as trolls can destroy wooden walls in a few hits.
3. Swamp Treehouse (build in invincible trees) — Best Swamp Outpost
Build your Swamp base in the branches of the large invincible trees. These trees cannot be destroyed, and enemies cannot reach you if you build high enough. A treehouse base puts you right in the middle of iron scrap pile territory, making your Iron Age grind dramatically faster. Use core wood or iron beams to build stairs and platforms around the tree trunk. The main challenge is that you need to reach the Swamp to begin with — bring portal materials on your first trip and connect back to your main base.
Best For: Swamp outpost, iron mining. Avoid: Building too low — draugr archers can hit you if your platforms are within bow range.
4. Plains Island (natural moat from water) — Safest Plains Base
Small islands in the Plains biome offer natural protection from ground-based enemies. Deathsquitos and Fulings cannot cross deep water, so a small island with a portal and a farm plot is practically invulnerable. This is the best location for late-game farming of Flax and Barley, the two crops needed for padded armor and linen. Build a dock on one side for boat access and keep a portal connected to your main base.
Best For: Late-game farming (flax/barley). Avoid: Islands that are too small — you need at least a 4x4 plot of cultivated soil for sustainable farming.
5. Mistlands near Coast — Access to Black Marble and Soft Tissue
The Mistlands offers the highest-tier non-Ashlands building materials (Black Marble) and resources for magical gear (Soft Tissue, Eitr). Build near the coast for boat access and on elevated terrain to minimize mist exposure. Strong defenses are essential — Seekers and Soldier bugs can destroy stone walls. Ballista turrets and raised earth walls are the recommended defense setup.
Best For: Magic resources, endgame base. Avoid: Building in deep mist valleys where visibility is permanently reduced.
6. Mountain Cave (inside a cave structure) — Sheltered from Weather
Some Mountain caves are large enough to build inside. These offer complete shelter from the Mountain's freezing weather and provide natural stone walls that enemies cannot penetrate. Caves are excellent for wolf farming (breed wolves inside the cave) and as a staging point for Moder boss preparation. You will need cold resistance gear (Wolf armor cape or Frost Resistance mead) to reach and work in the Mountains.
Best For: Wolf farming, Moder staging. Avoid: Caves with limited interior space — scout the cave fully before committing to a build.
7. Ashlands Coast — Endgame Location
The Ashlands is the final biome and offers Grausten, the highest-tier building material. An Ashlands coast base gives you access to the Fader boss arena and Ashlands resources. Extreme heat requires heat-resistant gear (Ask armor or Blazing Brew mead). Build using Grausten and iron-reinforced beams for maximum durability against Ashlands raid events. The Ashlands is not for beginners — only build here once you have full endgame gear.
Best For: Endgame mega-builds, Ashlands resource gathering. Avoid: Building in the Ashlands before you have heat-resistant gear and endgame weapons.
🛠️ Workshop Layout & Comfort
A well-organized workshop is the heart of any base. Combine it with the comfort system for maximized rested buffs that boost XP, health regen, and stamina regen.
Essential Workstations
These are the crafting stations you will need as you progress through Valheim's biomes:
- Workbench — The most basic station. Upgrade with a Roof, Tanning Rack, Adze, Forge Cooler, etc. Keep it under a roof and sheltered from rain.
- Forge — Metalworking station. Requires a roof and upgrades for higher-tier metal crafting.
- Smelter — Converts ore into bars. Produces smoke, so place it outside or in a vented shed.
- Kiln — Converts wood into coal. Also produces smoke. Keep near the Smelter.
- Stonecutter — Required for stone building pieces. Crafted after obtaining Iron.
- Artisan Table — Mid-to-late game station for crafting high-tier items like the Spinning Wheel.
- Black Forge — Mistlands-tier forge for crafting Black Metal and magic gear. Requires Eitr refinery nearby.
Optimal Placement
Spread your workstations across the base rather than cramming them into one room. The Workbench and Black Forge need roof coverage, while the Smelter and Kiln work best outside or in a dedicated smelting shed with a chimney or open walls to vent smoke. Smoke damage is real in Valheim — standing in smoke deals damage over time. Keep your main crafting area well-ventilated with open walls, windows, or a chimney that extends above the roofline.
A common layout is a central crafting hall with workbenches along one wall, forges along another, and a separate outdoor smelting area connected by a covered walkway. This keeps smoke away from your comfortable resting area while keeping everything within a short walk.
Comfort System
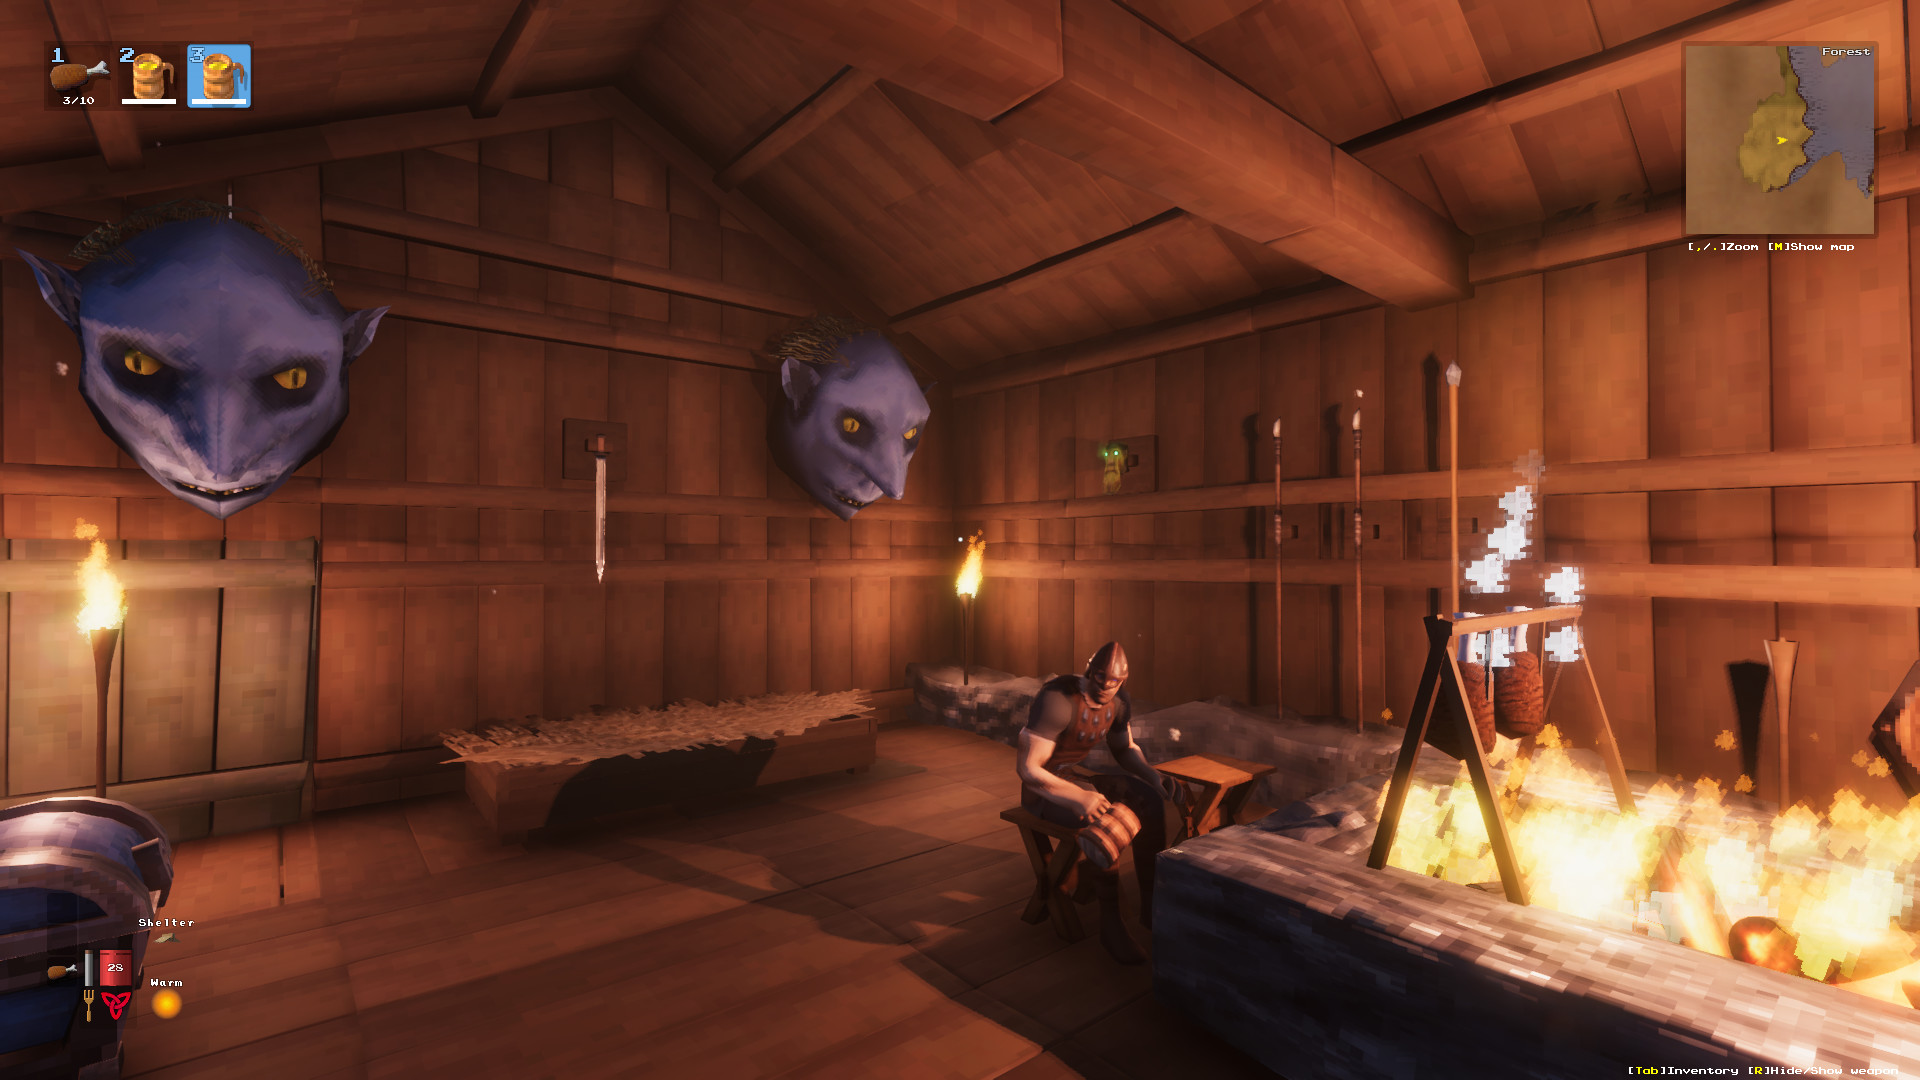
The Comfort system determines how long your Rested buff lasts. Higher comfort = longer buff duration. The Rested buff provides +50% XP gain, +100% health regeneration, +100% stamina regeneration, and resistance to some effects. Always have the Rested buff active when exploring, fighting, or grinding skills.
How comfort stacks: Each comfort item within range adds +1 (or +2 for some items) to your comfort level. The total comfort level determines the rested buff duration. Items stack additively — you want as many different comfort item types as possible within the same room.
| Item | Comfort Bonus | Materials | Where to Place |
|---|---|---|---|
| Campfire | 1 | Stone + Wood | Center of base, common area |
| Hearth | 2 | Stone + Core Wood | Main hall, central gathering spot |
| Rug (various types) | 1 | Leather scraps | Workshop floor, bedroom |
| Table | 1 | Wood | Kitchen, dining area |
| Chair / Stool / Bench | 1 | Fine Wood | Dining area, near table |
| Banner (various types) | 1 (stacks up to 3x) | Leather + Coins | Walls, entrance hall |
| Bed (straw) | 1 | Wood | Sleeping area, early game |
| Bed (dragon) | 2 | Iron + Wolf pelt | Late-game bedroom, main base |
Max comfort strategy: For the longest possible rested buff, place all of these items within range of your bed. Banners can stack comfort up to 3 times — use multiple banner types (Jarl, OLD, etc.) for +3 from banners alone. A Hearth (+2) in the main hall, a Dragon Bed (+2) in the bedroom, and every other item type within range gives roughly 20+ minutes of rested buff. This means you can explore, fight, and build for extended periods without returning to refresh the buff.
Rest tip: Always activate the rested buff before leaving your base. The +50% XP gain applies to all skills — weapons, running, jumping, woodcutting, and more. If you're grinding a specific skill (like blocking or running), coming back to refresh the rested buff every 20 minutes roughly doubles your skill gain rate over time.
🛡️ Defense & Raid Events
Six different raid events can target your base, each triggered by a boss kill and each requiring a different defensive approach.
Defense Structures
Building a defensible base means layering your defenses. Here are the main structures, from simplest to most advanced:
- Moats — Dig a trench around your base using the hoe and pickaxe. Enemies cannot cross deep trenches. Moats are the best early-game defense because they cost only time and stamina. The downside is that they're ugly and can be time-consuming to dig. Dig at least 2m deep and 2m wide — most enemies cannot jump that distance.
- Earth walls — Use the hoe's "Raise Ground" tool to create walls of raised terrain. Raised ground is completely indestructible — no enemy can damage it. Earth walls are the best defense in the game, bar none. Build a perimeter of raised ground around your base, leaving a gap for a gate or bridge. Enemies will path toward the gap, creating a chokepoint you can defend.
- Stake walls — Wooden walls with pointed spikes. These are a decent early-game option but have limited HP. Greydwarves can break through stake walls in about 30 seconds. They burn. Upgrade to stone as soon as possible.
- Stone walls — Fire-resistant and much higher HP than stake walls. Stone walls are the minimum standard for any permanent base. They survive most raid events except Ashlands-level attacks. Use core wood or iron beams on top for height.
- Ballista (Mistlands+) — An automated turret that fires missiles at enemies. Crafted from Black Metal, Yggdrasil Wood, and Soft Tissue. The Ballista automatically targets and fires at any enemy within range. It is highly effective against flying enemies (Drakes, Deathsquitos) and can be loaded with different ammo types for different biomes.
Raid Events
Each raid type is unlocked by killing a specific boss. The first triggered raid requires at least 3 base structures and 2 players nearby (or changes with world difficulty settings).
| Raid Name | Trigger (Boss Killed) | Enemies | Best Defense |
|---|---|---|---|
| Eikthyr triggers | Eikthyr (1st boss) | Boar + Neck patrol | Easy — any wall works. Can be ignored. |
| Elder triggers | Elder (2nd boss) | Greydwarf swarm | Stake walls + fire weapons. Greydwarves are weak to fire. |
| Bonemass triggers | Bonemass (3rd boss) | Skeletons + Draugr + Oozer | Blunt weapons + moats. Draugr can shoot over low walls. |
| Moder triggers | Moder (4th boss) | Drakes + Wolves | Roofed base + bows. Drakes fly, so open-topped bases are vulnerable. |
| Yagluth triggers | Yagluth (5th boss) | Fuling patrol | Stone walls + Atgeir. Fulings have torches that set wood on fire. |
| Queen triggers | Queen (6th boss) | Seekers + Soldiers | Ballista + earth walls. Seekers can fly over low walls. |
| Fader triggers | Fader (7th boss) | Ask/Embla warriors | Earth walls + Ballista + magic. Endgame defense required. |
Raid prevention notes: You cannot permanently disable raids, but you can make them trivial. Raids only trigger in areas with base structures (workbenches, beds, fires, crafting stations). If your base is entirely surrounded by earth walls or on an island, most ground-based enemies cannot reach you. Workbenches and campfires suppress enemy spawns within their radius — place them strategically around your perimeter to prevent enemies from spawning inside your walls.
The "no raid" strategy: Build a small, completely walled-off secondary base for your bed and workbenches, and keep your main operations at a separate "resource base" with no bed. Raids target the area around the most recent bed you slept in. By keeping your bed in a separate, ultra-defensible mini-base, you can control where raids happen.
🌀 Portal Network
Portals are your fast travel system. A well-organized portal network saves hours of sailing and running across the map.
Portal Basics
Portals require 10 Fine Wood, 2 Surtling Cores, and 10 Greydwarf Eyes to build. Each portal must have a unique name tag to connect to another portal with the same tag. This means you always need two portals with the same name to teleport between them — one at your destination and one at your origin.
Critical rule: You cannot teleport metals or metal items. This includes Copper, Tin, Bronze, Iron, Silver, Black Metal, Flametal, and any crafted items containing these metals (armor, weapons, tools, nails). You can teleport with food, potions, wood, stone, leather, trophies, and most non-metal resources. This design forces you to transport metals by boat, which is a core part of Valheim's exploration loop.
Best Portal Naming System
A consistent naming system prevents confusion as your network grows. Use short, descriptive, all-caps names:
- MAIN or HOME — Your primary base portal. Every secondary portal connects here.
- BOSS-EIKTHYR — Fast travel to Eikthyr's summoning altar
- BOSS-ELDER — Fast travel to the Elder's altar
- SWAMP-OUT — Your Swamp iron mining outpost
- MOUNTAIN-CAMP — Mountain base for silver mining and Moder prep
- PLAINS-FARM — Plains farming outpost for flax and barley
- MIST-OUT — Mistlands outpost for black marble and soft tissue
- TRADER — Fast travel to Haldor the Trader's location
Portal Hub Design
A dedicated portal hub is one of the most useful builds in Valheim. Design a central circular room with portals arranged around the perimeter. Place a sign above each portal labeling its destination. Use different colored banners or rugs to color-code regions (green for Meadows/BF, brown for Swamp, white for Mountain, yellow for Plains).
Key hub principle: Always keep one unconnected portal at your hub named something like "EMERGENCY" or "TEMP". When you're exploring and need to return quickly, build a single portal at your location named the same thing. This gives you a one-way trip home without needing to pre-build matching portal pairs across the map.
Priority order for portals: As soon as you build your first portal, connect to boss altars first — this saves the most travel time. Next, connect to key resource spots (copper nodes, swamps, mountain bases). Then connect the Trader. Add farming outposts and secondary bases as your world grows. Most players end up with 8-15 active portals in their hub.
⛵ Boating & Docks
Ships are the only way to transport metals and explore distant continents. Here is everything you need to know about Valheim's three boat types and how to build a proper dock.
Boat Types
- Raft (starter) — The Raft is barely functional. It is slow, has minimal HP (about 150), and can be destroyed by a single serpent attack or even a strong wind. The Raft has only 2 cargo slots. It is useful only for crossing narrow rivers or lakes in the Meadows. Avoid ocean travel on a Raft at all costs. Most new player deaths at sea happen because they tried to cross open water on a Raft.
- Karve (bronze nails) — Your first real boat. The Karve requires Bronze Nails (Bronze = Copper + Tin) crafted at a Forge. It has 4 cargo slots, decent speed, and approximately 500 HP. The Karve can handle coastal travel and short ocean crossings. It is vulnerable to serpents but can outrun them with favorable wind. The Karve is the minimum viable boat for exploring the Swamp or Black Forest coastlines.
- Longship (iron nails) — The best all-around boat in Valheim. The Longship requires Iron Nails (from Iron Scrap in the Swamp). It has 18 cargo slots — enough for multiple hauls of ore — approximately 1000 HP, and is the fastest boat in the game. The Longship handles rough seas much better than the Karve and can survive a serpent encounter. Highly recommended as your primary transport once you reach the Swamp.
Dock Design
A good dock makes shipping metals efficient. Follow these principles:
- Depth: Build your pier extending into water that is deep enough for the boat's hull to float freely. The Longship has a deeper draft than the Karve — test the depth before building. If you see the boat bottom scraping, extend the pier further out.
- Core wood poles are excellent for building dock supports because they are taller than regular wood and provide more stability. Use them as foundation pillars driven into the seabed.
- Covered storage: Build a small shed or covered area at the dock end of your pier. Place a chest here for quick unloading of ship cargo. This prevents you from having to carry each load of ore through your entire base.
- Lighting: Place torches or sconces along the pier so you can dock at night. Sailing in the dark without dock lights is how you miss your harbor and run aground.
Boat Protection
Boats left at an open dock can be damaged by random enemy spawns (greydwarves, necks, etc.) and storms. Protect your investment:
- Boathouse: Build a structure over your dock with wide gate doors (two regular doors or a double gate) that close to enclose the boat. This completely protects the boat from enemies and weather damage.
- Natural harbor: Find a small cove or inlet with natural rock walls on three sides. Build a gate or fence across the entrance. This creates a safe harbor without building full walls.
- Fenced cove: Use core wood poles driven into the seabed to create a fenced enclosure for your boat. The poles prevent enemies from reaching the boat and mark the harbor entrance clearly.
Serpent Safety
Serpents are the greatest threat to ocean travel. They have high HP, deal significant ramming damage to boats, and can destroy a Karve in about 10 seconds. Follow these rules:
- Don't sail at night. Serpents spawn more frequently at night and during storms. If you must sail at night, stay close to the coastline so you can beach the boat if attacked.
- Serpent attacks during storms: Storms trigger serpent spawns regardless of time of day. If a storm rolls in while you're at sea, head for the nearest coastline immediately.
- Bring arrows. If a serpent attacks, use a bow with Fire Arrows or Frost Arrows to kill it. Serpents drop Serpent Scales (used for the Serpent Scale Shield) and Serpent Meat (used for Serpent Stew, the best stamina food). A dead serpent is a profit — a serpent that destroys your boat is a disaster.
- Wind management: If you can't kill the serpent, sail with the wind to outrun it. The Longship is fast enough to escape most serpent encounters if you have favorable wind direction. Use the wind direction indicator on your ship's mast to adjust course.
❓ Frequently Asked Questions
Common questions about Valheim building, bases, portals, and defenses — answered.
How high can I build in Valheim?
What's the best base location for beginners?
How do I stop raids?
Can I teleport metals?
What gives the best rested buff?
How do I protect my boat from serpents?
How many portals can I have?
Data Sources & References
- Iron Gate Studio Official — Patch notes, official building mechanics documentation
- r/valheim Community — Structural integrity testing, base location suggestions, community builds
- Valheim Wiki — Building piece data, material requirements, raid event triggers
Was this page helpful?